
The intent of this article is to guide customers in the process of adding new account numbers to the UPS Billing Center.
Directions
- Login on UPS.com
- Navigate to the Online Billing Center
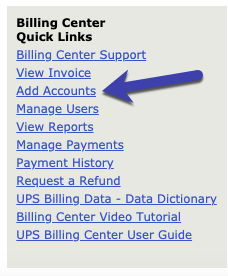
- Tap Add Accounts on the bottom right of the page (as shown below)
- Select type: UPS Package (default) (typical)
- Select Individual UPS Account or Consolidated Plan
- Specify Country
- Enter Plan Number (6 characters)
Not sure where to find plan number? Check the top of a pdf invoice. This can be found within PDF invoices within the online billing center or via pdf invoice that comes in the mail. Try the link below.
Pro tip: Keep the tab open that you are on now, tap the link below to open the page a pdf can be retrieved.
Billing > PDF invoices - Tap Continue button
- Enter Invoice Number and Invoice Amount.
Still having troubles: Call UPS Customer Service for additional help. 1 (800) 742-5877.
What’s next
Once you have successfully added the account to your UPS user account, the system will automatically retrieve invoices posted to that account as part of normal, standard operating procedures.